jiayou-021
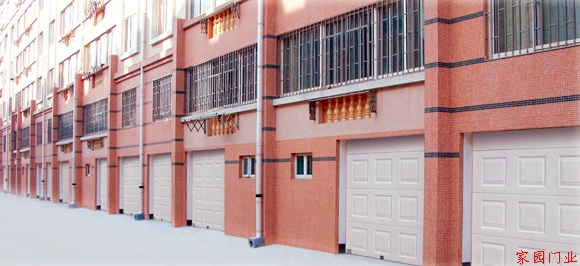
& nbsp; &n Bsp; & nbsp; metal garage door of Villa
Electric garage door automatic garage door villa garage door < br / >
Self installation steps < br / >
Step 1: measure 1. Measure the distance from the upper edge of the door to the top of the shed, or convert the distance from the upper edge of the intaglio plate of the garage door to the top of the shed. The minimum distance shall not be less than 250mm, so as to install the middle shaft rod of the garage rolling shutter door, which is generally required to be 300-400mm. 2. Measure the width of the left and right wall buttresses of the garage door opening. The normal size is 120 & mdash; 150 mm, and the minimum size is not less than 70. In general, the user should prepare three battens of 60 & times; 150 mm & times; garage door height & times. 3. Check whether there are any obstacles at the entrance, roof, left and right wall buttresses of Shanghai garage. Ceiling: mainly check whether there is any obstacle from the upper edge of the opening to the depth equivalent to the height of the whole door body, so that the operation of the door body is not blocked. Left and right wall buttresses: mainly check the distance between the wall buttresses and whether there is enough height to install the wooden frame: there is no obstacle in depth within this width, so as to facilitate the installation of light rail. Check the opening: mainly check whether the floor at the bottom of the opening is level. Write the above measurement data on the measurement sheet, order or contract, and inform the user of the work prepared in advance. Such as removing obstacles, preparing auxiliary materials (such as wooden frame, power supply, workbench or work site), etc.
Step 2: the size of the door frame must be the same as that of the door. The column of the door frame must be vertical and the beam must be horizontal.
Step 3: set up the door panel and window resource net < br / >
1. The door panel hinge and the fixing bracket are fixed at the bottom of the door panel with screws, and then the bottom bracket is fixed, and then the No. 1 hinge and No. 2 hinge are fixed at the connection between the first door panel and the second door panel and the upper end of the first door panel, and are connected according to the sequence.
2. Connection and assembly of door panel. Stand the first door panel at the opening, measure whether the door panel is level with the ground with a level ruler, and prepare to connect the second door panel with it after it is level. Note: when the first door panel is standing at the opening, the extension dimensions of the left and right door stacks shall be the same: the second and third door panels shall be connected up and down in accordance with the previously made hinge position.
3. Rail connection < br / >
A. Place the left and right vertical rails on the front of the wooden frame respectively < br / >
B. Put the track axle wheel in the track respectively and connect it with the hinge hole < br / >
C. Fix the rail on the wooden frame with self tapping screw < br / >
D. Fix the slideway connector on the track respectivelyAnd then measure whether the angle iron forms 90 & deg; angle with the wooden frame. E. connecting rail: connect the left and right bending rail with the connecting piece of the slide respectively. It is required that the bending rail or the connecting piece of the slide 90 & deg; angle note: after installing the connecting piece of the slide, fix the hinge of all connecting door plates.
4. Installation of torque spring < br / >
A. One end of the central shaft rod is sleeved with the shaft sleeve bracket < br / >
B. Insert the torque spring according to the left and right positions < br / >
C. Insert the wire rope pulley according to the left and right positions < br / >
D. Place the assembled women's shaft on the slideway connector < br / >
E. Fix it on the wooden frame of the door head with screws. Note: the torque spring and the twine drum are painted with colors to distinguish the left and right & quot; red, left and green, and right & quot; < br / >
5. The fourth door panel < br / >
A. Connect the door panel with the third door panel < br / >
B. Attach the steel wire on the wire rope sheaves on both sides to the first door panel.
C. Tighten the torque spring (generally tighten 8-9 circles, depending on the size of the door body). Note: push the door plate upward to check the lifting weight of the door body, and then increase or decrease the force of the torque spring.
6. Fixation of curve rail < br / >
A. Measure the distance between the curve rail and the ceiling with a steel tape < br / >
B. Cut off the porous angle iron according to the measurement size to make a triangle bracket: use the limit switch of the chain to adjust the rising height and the lowest point of the door panel < br / >
C. The porous triangle bracket is respectively fixed on the top of the left and right curved track of the shed top, and is connected with the curved track.
7. Connection between door opener and transmission chain < br / >
A. Connect the door opener with the chain < br / >
B. Fix the infrared sensor on both sides of the door frame < br / >
C. Connect infrared sensor, wall switch and door opening / closing circuit < br / >
D. Adjust the password of remote control and door opener < br / >
E. The red light of infrared sensor and wall switch is on, and the circuit is correct < br / >
F. Fix one end of the chain with the fixed connecting plate on the garage door with screws < br / >
G. Measure the distance between the chain track and the ceiling. Cut off the porous angle iron according to the measurement size < br / >
H. The cut porous angle iron is made into triangle bracket and fixed on the ceiling at one end of the door opener < br / >
50. Connect the triangle support with the door opener note: it is required that the chain is in a horizontal position. If there is a collapse in the middle, a porous triangle support can be added in the middle. 8. The connection of the emergency tare bar < br / >
A. Connect the short end of the tare bar with the door panel and the long end with the chain < br / >
B. Adjust the length and size of the tare bar (generally, the distance between the tare bar and the fixed end of the chain to the door panel is 250-300 mm) < br / >
9. Adjustment of lifting height.
10. Installation of left and right sealing strips < br / >
A. Cut off the sealing strip according to the height of the inner diameter of the hole < br / >
B. Nail the sealing strip into the wooden frame.
11. Dealing with the space left on the top edge of the entrance of the garage in Shanghai

 扫一扫,关注我们最新消息